Did you lately encounter the error 0x800703F1 while upgrading Windows to the next available version? Well, this bug does appear when there are missing files on the computer or the update components have become corrupt. The mere presence of Nvidia or related software may sometimes result in similar bugs or errors.
Many a time, an incorrect configuration inside Updates Services might also cause the error 0x800703F1. So, check whether all services are working fine and are in a good state or not. If they are in their default state, try these fixes – Uninstall Nvidia, Run SFC, Use Update Troubleshooter, etc. Manually upgrading Windows 10 Cumulative Update is the best way to overcome this issue.

Windows 10 Update Error 0x800703F1 Solutions
Before proceeding to the solutions, we suggest checking the status of a few Windows Update Services. Here’s how to check the current status of these services –
Check Windows Update Services Status
- Use “Win + S” to open the Search bar, type “services”, and click the top result.
- When the services window comes into view, scroll down and view the status of the following services –
|
|
Your device should meet the above configuration. If not, right-click on each one of them separately and choose the appropriate mode.
If the error persists even after the services match the above configuration, try the following suggestions –
1] Uninstall Nvidia drivers
Several users mentioned on Windows 10 forums that they solve this issue simply by uninstalling the Nvidia drivers. If there are Nvidia drivers or related software on the computer, remove them first. Restart Windows to remove any leftover files as well.
Sign back into your device and reinstall Nvidia drivers. If the error 0x800703F1 still occurs, try the next set of solutions.
2] Run System File Checker
The presence of corrupt or damaged system files may also prevent the update process from occurring. This happens only when you are an external security app to detect malware or viruses on your computer. Temporarily disable your antivirus first and then attempt to run the System File Checker (SFC).
SFC is a great in-built utility program to repair such faulty files or folders on Windows 10. Here are the essential steps to work upon –
- Open Command Prompt using Administrative rights.
- Type
sfc/scannownear the blinking cursor and hit Enter.
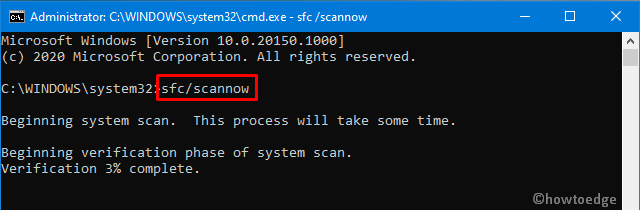
- Usually, this takes 15-20 minutes to scan and repair corrupt/missing files. So, wait patiently.
- Once this completes the whole process, Restart Windows.
3] Run Windows Update Troubleshooter
If the error 0x800703F1 is still appearing, there may lie some corruption inside the Windows Update files or services. Update Troubleshooter is a great tool by Microsoft that can find and repair all update-related bugs and errors on Windows 10 PC. Here’s how to run this troubleshooter –
- First of all, navigate to the below path –
Settings (Win + I) > Update & Security > Troubleshoot > Additional troubleshooters
- Click to expand the Windows Update box and hit Run the troubleshooter.

- Now, follow the on-screen instructions to complete the remaining steps.
The error must have been resolved by now. If not, try the next set of solutions discussed below.
4] Restart Windows Update Components
Sometimes, this bug arises simply due to corruption inside the Update components. To correct this, you need to manually restart all Windows Update components. Here’s how to perform this task –
- Use Win+R to launch the Run dialog.
- Type “cmd” and press Ctrl + Shift + Enter keys together to start Command Prompt as Admin.
- Now, execute the below codes one after another. Make sure to press Enter at the end of each command.
net stop wuauserv
net stop cryptSvc
net stop bits
net stop msiserver
ren C:WindowsSoftwareDistribution SoftwareDistribution.old
ren C:WindowsSystem32catroot2 Catroot2.old
net start wuauserv
net start cryptSvc
net start bits
net start msiserver
- Once over, Restart Windows so that the changes made come into effect from the next login.
Sign back into Windows and try to perform Windows Update again. If the problem still exists, try the next fix.
5] Perform Clean Boot
At times, third-party applications start interfering with core files resulting in similar error codes. To rule out this, you must perform a clean boot and check if you are now able to update Windows or not. Here’s how to proceed –
- Make right-click on the Windows icon and select Run.
- Type
msconfigand hit OK to launch System Configuration.

- Head over to the Services tab and mark the “Hide all Microsoft services” checkbox.
- Next, click Disable all.
- Switch to the Boot tab, and mark the “Safe boot” checkbox under Boot options.
- Tick the box left of the “Minimal” option as well and hit Apply then OK.

- Your computer will restart and enter Safe Mode.
- Navigate to the below path and try to update Windows once again.
Settings > Update & Security > Windows Update > Check for Updates
If the 0x800703F1 error is appearing due to some third-party apps, checking for updates should work now. This is because all such programs remain disabled in the Clean Boot state.
6] Manually download and install the Standalone Package
In case none of the above fixes work to solve the 0x800703F1 bug, one should go for manually upgrading Windows. Here is the complete guideline –
- First of all, launch your default web browser and navigate to the Windows 10, Update history page on it.
- You will see different versions of Windows 10 enlisted on the left sidebar.
- Select your own version, and then select the latest cumulative update.
- Head over to the right pane and note down the “KB” number. See the Snapshot below –

- Visit Microsoft Update Catalog next and type the copied “KB” number in the search field.
- Press Enter and you will find a list of recent updates appearing for different system architectures.
- Select the one that best matches your system configuration, and hit the Download button.
- Go ahead and click the top link to begin downloading the respective standalone package.
- When the download completes, double-click on this setup file.
Your system will soon restart and upgrade to OS Build of the chosen cumulative update.
I hope the update error 0x800703F1 resolves now on your Windows 10 PC. In case it is still appearing or you find any difficulty following this guide, let’s know in the comment section.
What is Error code 800703f1 in Windows 10?
The error code 800703f1 is short for the error 0x800703F1. This occurs when some of your system files have gone missing or have been corrupted due to the presence of third-party apps. Try running the SFC utility and check if the problem resolves way. Go for the System File Checker only when you have ensured temporarily disabling or at least uninstalling your external security app.
Why does Windows Update 20H2 keep failing?
For Windows updates to occur without any error code, all update components must remain updated and without any internal conflicts between them. You may reset Windows Update components beforehand trying out any workaround discussed in this article.