In Windows and Windows compatible software, the print error 0x00000771 is a common hexadecimal error. This error primarily occurs because of system file damage, network issues, the required services not running in the background, or after updating/installing new apps or Windows updates.

Since you are here, you must be wondering how to overcome this bug on your device. Well, you have come to the right place as in this post, we will discuss the possible causes behind it and the four working ways that should resolve this issue.
What causes Printer Error 0x00000771?
The print error 0x00000771 is a Windows error that is primarily caused by system file damage. System files become corrupted for a variety of reasons, including improper uninstallation or installation, as well as improper shutdown or deletion of application hardware.
The 0x00000771 error message appears in a variety of situations when trying to use printers. It can happen when the new printer is connected to a computer or over a network. This is a problem that has existed for several years and affects all types of printers.
There is a chance that this error will occur when the user connects a new printer to the computer. When you choose the default printer, which you do every time, there’s a chance that you’ll get the error 0x00000771. Configuration settings and service-related issues are the main causes of this error. Many of them believe it is due to an error caused by the printer’s removal.
Fixing Printer Error 0x00000771 on Windows
If you are getting an error code 0x00000771 while printing documents, try out these solutions, and see if any resolve this issue.
1. Try the Printer Troubleshooter
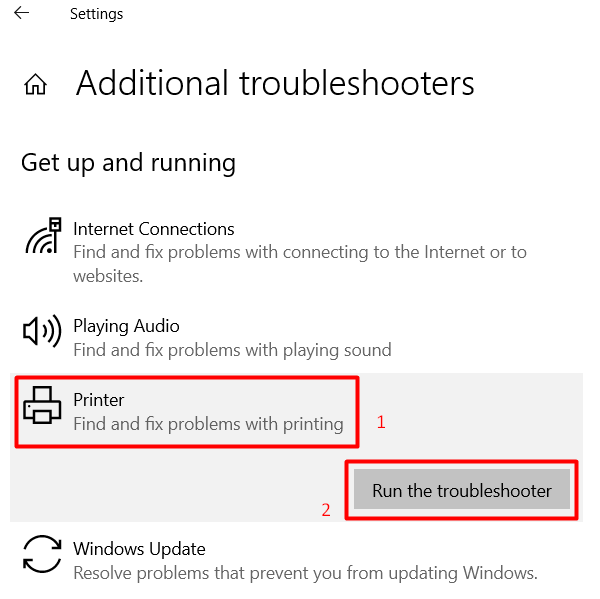
There is an in-built troubleshooting tool on Windows PC that you should try first to find and resolve the underlying causes. Here’s how to run this troubleshooter and repair issues using it –
- Press Win + I to launch the Start window.
- Type “troubleshoot” into the search box and press Enter.
- Look for the phrase “Additional troubleshooters“.
- Select “Printer” from the drop-down menu, then click “Run the troubleshooter.”
- Wait for the search process to finish before attempting the suggested fixes.
- Restart your computer to see if the problem has been resolved.
Note: If you are on Windows 11 OS, navigate to this path instead and run the troubleshooter.
Settings > System > Troubleshoot > Other troubleshooters
- After reaching out to the above path, find the Printer section and hit the Run button beside it.
- When the troubleshooter launches, click Next and follow the on-screen instructions.
2. Check the Print spooler service
To avoid facing any issues related to the printers, the print spooler service must be operational and set to “Automatic”. Go and check if the printer service’s setting is set as discussed above. To do so, use the steps –
- Press Win + R to launch the Run dialog.
- Type “
services.msc” inside it and hit OK. - When the Services window opens up, look for “Print spooler” on its right pane.
- When found, check what’s written next to it under the Status column.
- If it’s already running, right-click on Print spooler, and hit Restart.

- Else, right-click on it and choose the option – Properties.
- On its properties window, change the startup type to “Automatic”, and hit Start.
- In the end, click Apply then OK to confirm this configuration.
3. Uninstall Recently installed updates
The printer Error 0x00000771 may sometimes also occur due to corrupted updates or incorrect software installation. If you notice this error after a recent update or application installation, make sure to get rid of the update/program first.
To uninstall a problematic app, do the following –
- Press Win + X, and select “Apps and Features”.
- On the subsequent window, scroll down and locate that particular software.
- When found, click the three dots available to its right end, and hit Uninstall.
- When a pop-up window appears, hit uninstall again.
Here’s how to get rid of recently installed updates –
- Type “Control panel” into the Windows search box and press Enter.
- Type “program” into the search bar, then “Uninstall the program.”
- On the left-hand side of the window, select “View installed updates.”
- Double-check that the entries are displayed in the order in which they were updated.
- Uninstall the most recent update after selecting it.
- To complete the uninstallation process, follow the instructions on the screen.
- Restart your computer after the uninstallation completes.
Note: After uninstalling recent updates, make sure to disable auto-updates on Windows for at least 7 days. Here’s how to disable automatic updates on Windows PC.
4. Modify the relevant entry on the Registry
If none of the above workarounds help to resolve the printer error 0x00000771 on your computer, there might be some issues with printer registries. Go and check if that’s the case or not. In case you do find permission issues, provide the same by editing the relevant entry inside the registry. Here’s how to perform this task –
- Type “Regedit” into the Windows search box, then press Enter.
- When the user control appears, tap “Yes“.
- Follow the directions to the specified location –
"HKEY_CURRENT_USER\Software\Microsoft\WindowsNT\CurrentVersion"
- Look for the Windows entry, right-click on it, and then select Permissions.
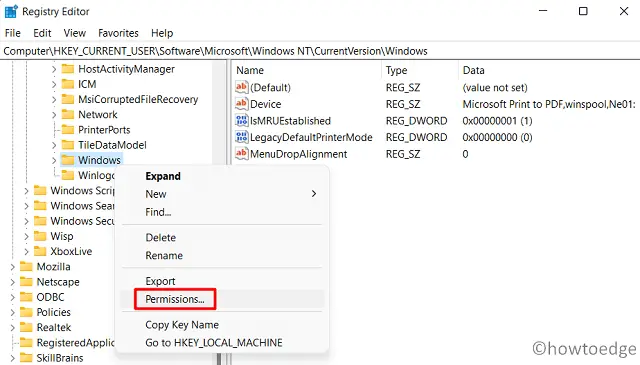
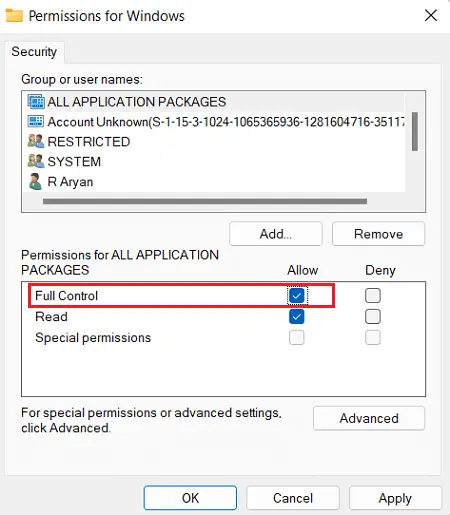
- Select the group to which you belong i.e. an administrator, a group, or a username.
- Select full permissions from the full control list.
- Open the registry editor, click Apply, then OK, then close it.
I hope the four methods listed above were helpful in resolving the printer error 0x00000771.