In this guide, we will discuss two different ways that you may use to limit Diagnostic Data Collection on your Windows 11 PC. Diagnostic data is basically a set of information that tells how your device responds when it faces bugs or errors. Microsoft works upon the collected data so that it can improve the user experience at the same time working on the issue that occurred.
By default, this feature stays enabled on Windows 11 or 10 PC. If you don’t want Microsoft accessing your diagnostic data, you may put a limit on it. For this, you may take the help of either Registry Editor or Group Policy.

How to Fix High DPI issues on Windows PC
Limit Diagnostic Data Collection in Windows 11
If you want to stop Microsoft from collecting diagnostic data on your PC, you may modify the respective registry or the group policy. The registry method suits all Windows editions, while the policy method doesn’t work on Windows 10 Home edition. So, depending upon which edition you are currently having on your computer, follow the steps outlined below –
1] Tweak Registry settings
As stated above, you may modify certain entries inside the registry so that Windows stops collecting data from your computer. Before you do so, make sure to create a full registry backup. This will help you recover your Windows operating system in cases where something goes wrong.
Here’s what you need to modify inside the registry editor –
- Press Win + R to launch the Run command.
- Type “
regedit“, and hit OK next. - Inside the opened registry editor, browse to the below path –
HKEY_LOCAL_MACHINE\SOFTWARE\Policies\Microsoft\Windows
- Alternatively, you may also copy/paste this path inside the navigation bar, and hit Enter.
- Once located, right-click on the Windows folder, and select as follows – New > Key.
- Rename the newly created key to “
DataCollection“. - Right-click again on this key and proceed as follows – New > DWORD (32-bit) Value.
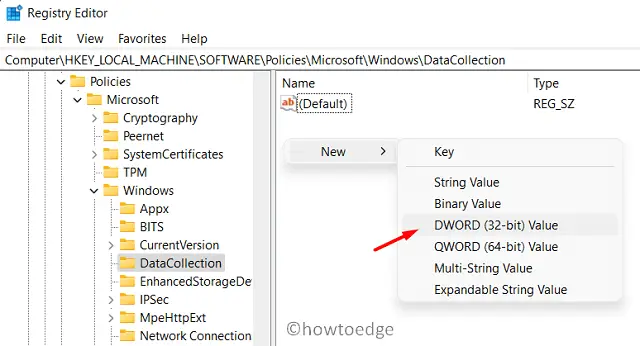
- Rename this DWORD entry as “LimitDiagnosticLogCollection”.
- Double-click on the newly created Reg entry and put “1” instead of “0” under the Value data field.

- In the end, hit OK to confirm this setting and close the registry editor.
- Restart your PC next so that changes made become effective from the next logon.
Tip: In case you ever want Microsoft to collect the diagnostic data, re-visit the path provided above, and replace “1” with “0” in the Value data field.
2] Configure Group Policy
This method is applicable to only those users who are currently on Windows 10 Pro, Enterprise, or Student editions. If you are on the Home edition, skip this solution and try out the first solution. Here’s what you need to do on your PC –
- Press Win + S, and type “Policy” in the search bar.
- Click the top result to enter the Local Group Policy Editor.
- Once you are inside, navigate to the following path –
Computer Configuration > Administrative Templates > Windows Components > Data Collection and Preview Builds
- When reached the above location, scroll down and locate the “Limit Diagnostic Log Collection” policy on the right pane.
- Doule-click this policy to change its current configuration.
- By default, this is selected as “Not Configured“. Tick the radio button left of the “Enabled” option.
- Click Apply then OK to save this configuration. Do reboot your PC next to confirm the changes made so far.
I hope you find this article useful to Limit Diagnostic Data Collection by Microsoft on your computer.