In this guide, we will discuss what causes error code 0x80070659, when it occurs, and what are the possible ways to fix it on Windows 11/10.
This is basically an update-related issue and comes into existence only when you try to install any pending updates on your computer. The update could be of anything like – Security/Non-security patches, .NET frameworks, or even Optional updates.

What may cause Error Code 0x80070659 in Windows?
Error code 0x80070659 typically happens when your device meets one or more of the following conditions –
- Network glitches
- Corrupted update components
- Accumulated huge cache or temporary files
- Buggy software running on your device
Note: If this error had started after installing a specific program on your computer, make sure to uninstall that app, and see if you can update your PC now.
How to Fix Update Error Code 0x80070659
If you are getting an error code 0x80070659 while updating your Windows OS, follow these solutions in the same order as presented below –
1] Run Windows Update again
An update error may occur from nowhere and doesn’t necessarily mean you have to find and fix the reasons behind it. This might have occurred due to some network glitches or essential services not running at that time. So, before you go and apply the solutions, restart your PC for once.
When your device reloads, check if you can download/install updates now –
- Windows 10: Settings (Win+I) > Update & Security > Windows Update
- Windows 11: Settings (Win+I) > Windows Update
After reaching the above path on your respective version of Windows, hit Check for updates.
Fix: Check For Updates doesn’t work in Windows 10
2] Troubleshoot Windows Update
Windows Update troubleshooter is the most effective tool when you come across any error while updating your device. This tool was always there, however, its capabilities have hugely increased with the onset of Windows 10. You will find this very useful on Windows 11 as well. Here’s how to perform this task –
Note: This section elaborates on how to troubleshoot Windows Update on Windows 11. Learn how to get it done on Windows 10 PC.
- First of all, press Windows + I.
- Select System on the left pane.
- Move to the adjacent right, scroll down, and hit Troubleshoot.

- Three options will appear next; choose Other troubleshooters.
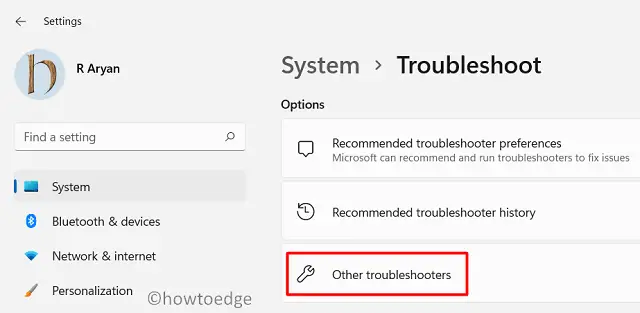
- You may now see a Run button beside Windows Update. This is available under the “Most frequent” section.

- Well, click over it once and follow the instructions that appear subsequent to this.
Restart the PC when the troubleshooting completes and check if this solves the issue that you were dealing with.
3] Delete Temporary Files
System-generated files or app cache keep on increasing with each passing day on Windows 11/10. Over a period of time, these files start attracting unwanted bugs or issues on your device.
As these files are temporary in nature and don’t affect the core functioning of Windows or its apps, you should delete them manually. Disk Cleanup is an in-built tool that you can use to get rid of unnecessarily stored cache, upgrade files, previous installation(s), etc.
Nowadays, you can also enable Storage Sense on your operating system. Turning this setting ON will automatically look for files that it can delete when the disk space is low.
How do I clear Windows 11 Cache – Delete Temporary Files
4] Reset Update Components
The prime source of any update-related errors on a device is none other than the corrupted update components. So, if the above solutions don’t work in your case, reset the update components and check if this helps.
The resetting process consists of mainly three things and they are –
- Stopping update-related services
- Clearing update cache folders – Catroot2, SoftwareDistribution
- Restarting all the services that you have stopped earlier
Let’s see how to reset update components via Command Prompt –
- First of all, open CMD as an administrator.
- On the elevated console, run this code multiple times –
taskkill /f /fi "SERVICES eq wuauserv"
- Now that you have ended all the tasks or processes on your PC, run these commands one after another.
net stop cryptSvc
net stop bits
net stop msiserver
- After stopping the essential services, rename the Windows Cache folder. To do so, run this code –
ren C:\Windows\SoftwareDistribution SoftwareDistribution.old
ren C:\Windows\system32\catroot2 catroot2.old
- Restart your PC next and restart the services that you stopped earlier.
net start cryptSvc
net start bits
net start msiserver
Check if you can now update your device without getting into error code 0x80070659.
5] Use System Restore Points
If you are still getting the error code 0x80070659 while updating Windows and have access to a restore point, you should revert back your operating system to that point. Performing this task is super easy; here’s how to do this on Windows 11 or 10 PC –
In case you don’t have any restore point saved on your PC, or the restoring is not occurring, you may consider clean installing Windows 11.