Enabling Clipboard history on Windows 11 allows users to store all recently copied items inside the Clipboard itself. If you do copy/paste sensitive information like passkey from one place to another, it remains inside the Clipboard unless you clear it off manually. So, it becomes very crucial to clear Clipboard history data on Windows 11 as soon as you are done using that password.
In this post, we will discuss four different ways by which you can easily purge the data stored inside the Clipboard. One of these methods explains creating a shortcut to instantly clear copied data inside Clipboard.

Why is it necessary to clear clipboard history data on Windows 11?
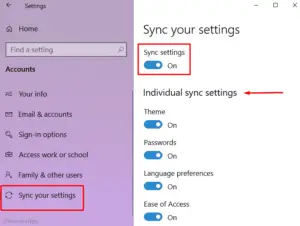
As stated earlier, Clipboard contains the copied items as long as you didn’t clear the history manually on your Windows 11 PC. With features like Cloud sync using OneDrive, this data syncs across different devices, and if someone accesses your device by accident, s/he comes to know of all your passwords or other sensitive information.
If you don’t let others use your device (smartphone, laptop, etc.) or haven’t yet activated OneDrive on your Windows 11 PC, rest assured and keep using the Clipboard history. Otherwise, you should know the ways by which you can easily clear off the saved data inside Clipboard.
Ways to Clear Clipboard History Data on Windows 11
Let’s learn the four ways by which you can easily clear clipboard history on your Windows 11 PC. They are as follows –
- Using the Clipboard itself
- Via Settings
- Use the Run utility
- Create a shortcut and use it to clear Clipboard history
1] Open Clipboard and selectively delete copied items
The best way to clear copied items inside the Clipboard is by opening the Clipboard itself. To do so, press the Win + V hotkey and hit the Clear all button.

Using this, one can even delete copied items one by one inside the Clipboard. For this, press Win + V, and locate the item that you would like to delete. Click the three dots available on it and hit the delete button.

There’s a way to pin any items inside the Clipboard as well. All you require is to find the item that you would like to pin and hit the Pin button just below the eclipse (…) button.
2] Clear Clipboard Items using Settings
Alternatively, you may also clear Clipboard data directly from the Settings app. Here’s how to perform this task –
- Press Win + I to launch the Settings app.
- Select System on the left navigation and head over to the right pane.
- Scroll down to the bottom and click Clipboard.
- On the next screen, come down to the “Clear clipboard data” section and hit Clear.
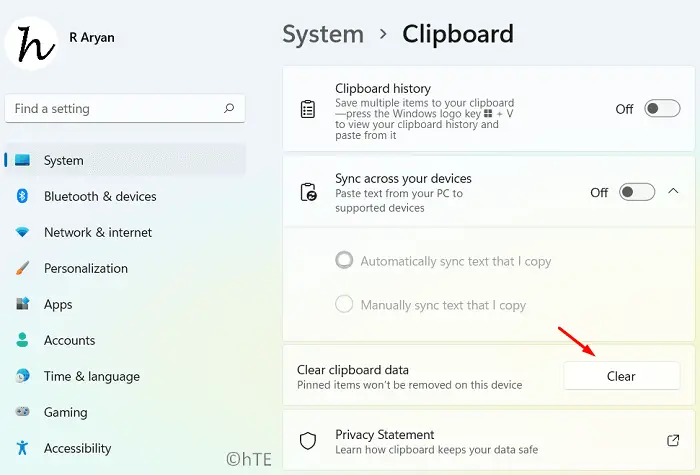
All copied items present inside the Clipboard will be lost immediately afterward.
3] Use Run to Clear Clipboard items
One may purge the stored data inside the Clipboard from the Run utility as well. In this method, you need to open the Run dialog by pressing Win + R. Type the below path on it and hit the OK button.
cmd /c echo.|clip
Command Prompt will launch next and run the above code. This happens so fast that you might not even notice the CMD opening. You may press Win + V to see if the Clipboard contains any data inside it.
4] Create a shortcut and clear Clipboard history
If clearing Clipboard history is a regular task in your case, you might feel opening Run, Settings, or even Clipboard takes time. Well, in that case, you may create a shortcut for yourself and put it on the desktop Screen. Whenever you feel like clearing off the copied items inside Clipboard, all you need is to click on the newly created shortcut.
Here’s how to do this –
- Right-click anywhere on the desktop and choose New > Shortcut.
- A new window titled “Create shortcut” opens up next.
- Copy/paste the following under “
Type the location of the item” and hit Next.
cmd /c echo.|clip

- This will automatically name this shortcut. You may provide a name for this shortcut as well. After doing so, click on the Finish button and the shortcut will be generated on your Desktop.

That’s it, you have successfully created a shortcut to delete the recent items inside the Clipboard. Whenever you feel like deleting the copied items inside the Clipboard, just double-click on this icon present on the desktop screen.
Accessing this shortcut requires minimizing all windows on your computer and then double-clicking on it. You may assign a hotkey to its launching and running automatically. For this, right-click on the shortcut and select Show more options. The previous context menu will launch next, choose Properties here.
When its properties window launches, head over to the Shortcut tab. Under the Shortcut key:, press your preferred hotkey and click Apply > OK.

- Next, launch Run by pressing Win + R. Type the following on it and hit OK.
shell:Start menu
- You will be redirected to Programs under File Explorer. Copy the recently created Clipboard shortcut on the desktop and paste it inside the Programs folder.

That’s it, you have assigned a hotkey to this shortcut and whenever you use this hotkey, the recent item will get cleared off from the Clipboard.
How to turn off Clipboard on Windows 11
If you wish, you may disable Clipboard or store the copied items on Windows 11 as well. To do so, use these steps –
- Press Win + I to invoke the Settings app.
- Go to System > Clipboard next.
- Disable the toggle switch available next to the Clipboard history.
That’s it, the Clipboard will stop saving multiple items on it. As a result, there won’t be any Clipboard history on your Windows 11 PC. In case you ever want to reverse it and enable storing multiple items inside Clipboard, all you need is to re-enable this toggle switch.
Read Also: How to Clear Clipboard History Data on Windows 10