Recently, a few users complained of getting into a Printer Error 0x00000077 after they upgraded their operating system to Windows 11. This error may also occur when you try upgrading to Windows 10 latest version from its older versions. When this occurs, any print job won’t be completed, and you receive an error message. This error may also occur when you are testing your printer for the first time.
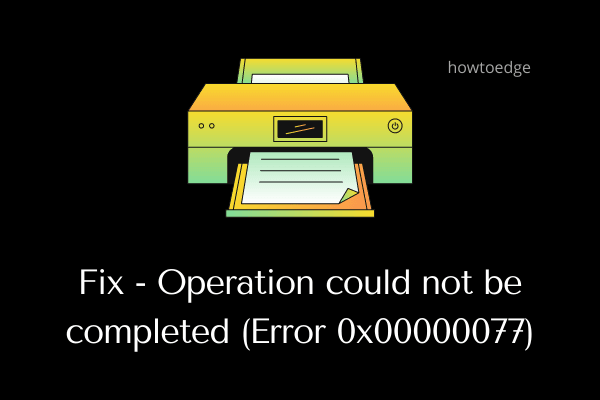
Operation could not be completed. (Error 0x00000077)
Whatever the reasons behind this error code, we will look into all of them one by one. Apart from knowing the reasons behind it, we will also look into six fixes that should resolve this issue on Windows 11/10 PC.
What causes Printer Error 0x00000077?
Though this error might occur because of several issues, we will adhere to the most probable ones. Most likely, this error occurred because of these reasons –
- Loose connecting wires or power cables
- After you install a cumulative update
- Pending optional driver updates
- Using an external security application
- You have installed the printer drivers incorrectly
- Corrupted registry entries
Fix Printer Error 0x00000077 on Windows 11/10
If you are getting an error code 0x00000077 while using your printer or printing documents, attempt these fixes one after another. We suggest applying them in the exact order as guided below. However, if you do know the reasons behind its occurrence, you may apply that particular solution as well.
1] Power off your Printer and unplug/replug its connecting wires
Sometimes, a loose connecting wire or the power cable might also result in a similar error code. Try turning off your Printer and then remove all the connecting wires and the power cable. Wait for a few minutes, make the connection, and check if your Printer starts working all right.
2] Remove Lately installed Cumulative Updates
Most of the time, printer errors including 0x00000077 occur after you upgrade your operating system to its recent OS Build. Though it is mentioned in the release note itself that you might encounter printer-related issues, users often let go of such messages.
Well, now that you are already facing a printer error, you have three options to choose from –
- Wait for the next cumulative update: Assuming Microsoft has already mentioned getting this error code, they must have already started working on that error code. Wait for one or two security updates, and this error will get resolved automatically.
- Uninstall the previously installed cumulative update: This is the perfect way of avoiding getting into any printer-related issue on a Windows 11/10 PC. Just visit Settings > Windows Update, look for the update history, and uninstall the recent patch updates.
- Try the below solutions: Only when the above fix fails to resolve the error code 0x00000077, try the solutions discussed below.
3] Install Optional Printer Updates
All drivers should function properly and remain up to date on Windows PC. Failing this, your printer may throw an error code 0x00000077 when a print job is given. Go and check if there is any pending optional update for your computer. If you do find any driver update while checking for it via Windows Update, download and install that on your PC. To do so, you may follow these easy steps –
- Press Win + I to launch Settings.
- Click Windows Update and hit Check for updates.
Note: Windows 10 users may browse to the below path instead and hit Check for updates.
Settings (Win + I) > Update & Security > Windows Update
- The system will connect to Microsoft servers and check for any pending updates.
- If it does find any driver updates for your PC, the optional updates link will come into view.
- Click over this link, mark all the checkboxes, and hit “Download and Install”.
- Wait for a while the system is installing pending updates on your computer.
- Once this is over, restart your Windows PC and check if the error 0x00000077 resolves.
4] Uninstall the native software and then reinstall it
Whenever you first use a printer, you are required to install the program that comes along with the printer. With time, this software too becomes outdated and requires an update. Visit your printer’s official site and look for the latest patches there. If you face difficulty finding it, you may contact its manufacturer and ask for the recent patch update.
Alternatively, you may also look for any driver updates by visiting Device Manager. This method will work only on PCs that have older versions of Windows 10 installed on them. Here’s how to attempt this solution –
- Press Win + S, type Control Panel in the text field, and hit Enter.
- Use the drop-down menu next to View by and select Large icons.
- Select Devices and Printers.
- Locate your printer on the upcoming window, right-click on that, and hit Remove device.
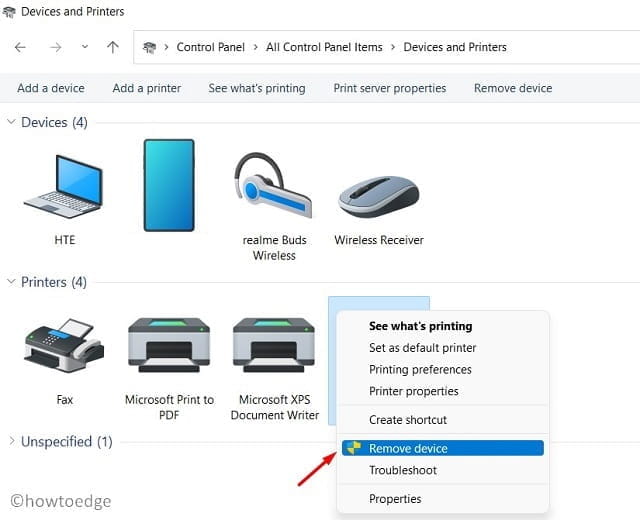
- A confirmation window might pop up next, hit Yes.
Now that you have disconnected your printer from your PC, follow these steps to remove it wholly –
- Press Win + R to launch the Run dialog.
- Type “printui.exe /s” and hit OK to open Print Server Properties.
- Go to the Drivers tab and remove your printer from here as well.
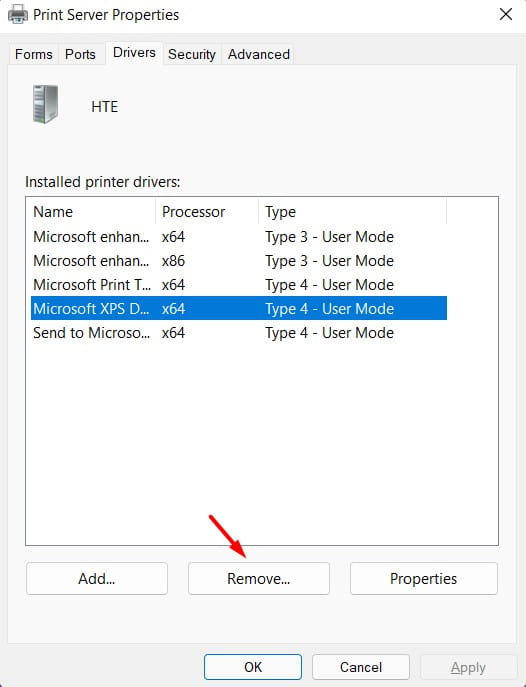
- Click Apply then OK to confirm the recent changes.
- Come out of the current window and restart your PC.
Sign back into your device again and connect your Printer afresh to your computer.
5] Try the official app from Microsoft
With the launch of Windows 11, Microsoft has increased the app integration from its Store app. So, to avoid any issues and increase performance, one should always install the software via Microsoft Store. Before you proceed ahead and install the official app, make sure to delete the existing program. Here’s how to remove any software in Windows 11 –
- Press Win + X and select Apps and Features.
- On the right pane, scroll down to the printer app, click the three dots, and hit Uninstall.
- A confirmation window will pop up next, hit Uninstall again.
- Restart your PC and when it does, launch Microsoft Store.
- Search for your printer app here in the Store app.
- Click Get and then Install to have this app installed on your computer.
You may now connect your printer using this app and print documents without getting into any issues.
6] Configure the Registry
If none of the above solutions work to resolve this error code, modifying the related registry should address this problem. Here’s what you need to modify on your Windows 11 PC –
- Press Win + R to launch the Run dialog.
- Type “
regedit” on it and hit OK. - When the UAC prompts, click Yes.
- Inside the registry, browse the below path –
HKEY_LOCAL_MACHINE\SOFTWARE\Microsoft\Windows NT\CurrentVersion\Print\Providers\Client Side Rendering Print Provider\Servers\YourPrintServerName\Printers
- Once you are there, look for what is present inside the Printers folder. You may see several printers bearing arbitrary alphanumeric numbers.
- Delete all such entries, and once this is completed, close the registry.
Now, open the Services window and search for Print spooler service on it. When you find this service, right-click on it and choose the Start/Restart option. Reboot your PC and check if the error code 0x00000077 resolves now.
What is an INF file?
When you download a driver package online, it contains an INF file. This file is a setup file that helps to install any driver correctly on your computer. Moreover, this file stores information like –
- Location of the catalog file (one which contains the digital signature of all the files in a driver package).
- List of Source files that are to be copied to the system.
- Information about supported system architecture.
- And, the true name of the printer driver.
How do I fix the Print Error?
If you are unable to perform a print job on your computer, you may consider applying the below fixes one after another. These solutions will check for the real culprit and help you to overcome the printing issue.
- Unplug and restart your computer
- Check cables or Wireless connection
- Restart the Print spooler service
- Uninstall and reinstall the print drivers
- Change your printer’s status to Online
After you apply these fixes, check if you can print documents from your Printer normally. In case you are still struggling with the same issue, let us know in the comment section.