Compared to traditional printers, network printers are of much importance these days. Whether you want to print a document saved on your mobile, laptop, cloud, or elsewhere, modern printers let you do all of it. However, what if you are getting an error – “Printer Configuration Problem 0x80070077” on your Windows 10 PC.
Well, all your printing jobs will either stop or get stuck until you resolve this error code. In this post, we have presented a list of reasons that may trigger this error and four ways to overcome this issue. Let’s explore the solutions in detail –
How to Set the Default Printer in Windows 11
Fix Printer Configuration Problem 0x80070077 in Windows 11/10
If you are facing trouble printing documents due to some configuration issue “0x80070077”, try out the solutions discussed below.
1] Remove Printer drivers
The printer errors appear mainly when the print drivers have been corrupted somehow. So, remove all such drivers using CMD and check if the issue resolves. Here’s how to perform this task –
- Press Win + S, and type “CMD” in the text field.
- Right-click on the top result and select Run as administrator.

- The UAC window will appear next, click Yes to authorize opening Command Prompt as administrator.
- Type the following on the elevated console and hit Enter –
printui /s /t2
- The prompt will redirect you to the Print Server Properties window.

- Select your printer driver and hit the Remove button. Tick the “Remove driver and driver package” radio button and hit OK.
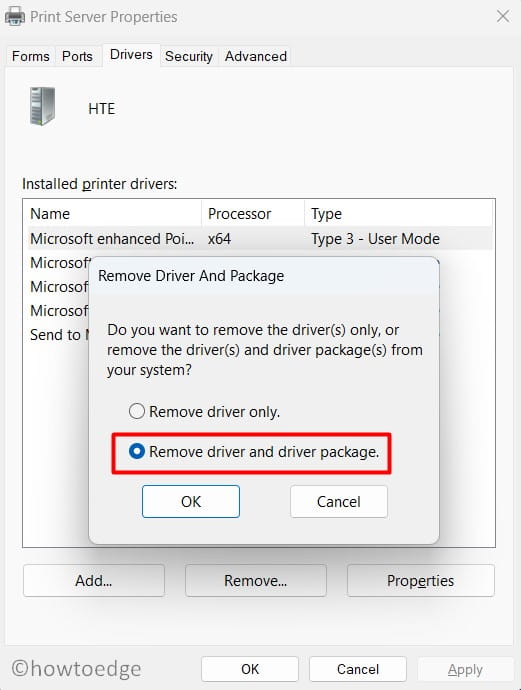
Note: Repeat this step until you remove all “Installed Printer drivers“.
- Restart your PC so that changes made become effective.
Windows internal drivers will automatically install when you restart your computer. However, for a printer-specific driver, you need to visit your Printer OEM website and search for the latest patch update there. Make sure to use the exact brand and model of the printer that you are using.
2] Troubleshoot Printer
The Printer troubleshooter is the next best way to find and resolve the printer configuration problem 0x80070077. This is basically an in-built tool in Windows that can access the underlying causes and resolve them. Even in cases, where it could not provide a resolution, this will suggest ways that can resolve this problem. Here’s how to utilize this tool in Windows 11/10 PC –
- Press Win + I and select System.
- Click Troubleshoot and then Other troubleshooters.
- When this section expands, locate the Printer tab, and hit the Run button available on its right end.

- The troubleshooter will start and prompt you to select your printer.
- Well, do the same and hit Next. Wait while this tool is looking for the reasons behind printing issues.
- This tool will either resolve the issue automatically or display a button – “Apply this fix“. Click on this button so that Windows presents a solution to the aforementioned issue.
- Close the troubleshooting window and restart your PC.
Sign back into your device again and check if you can print documents without getting into any configuration issues.
3] Restart Print Spooler Service
Printer errors often occur when the print spooler service is either disabled or has been corrupted somehow. To check its current running status, do the following –
- Press Win + R to launch the Run dialog.
- Type “
services.msc” and hit OK. - When the Services window opens up, scroll down and locate Print spooler service.
- Right-click on this service and hit the Start/Restart button.

Note: Start is applicable if the print spooler service is disabled. If it has already been up and running, hit the Restart button.
4] Replace PrintConfig.dll File
A printer functions properly only when the relevant files are present and running on your computer. PrintConfig.dll is one such important file without which, the print jobs will always fail. When this file goes missing or has been damaged, your printer couldn’t access info like size, range, scale, and several others. Reinstalling or repairing the DLL file should resolve the Printer Configuration problem 0x80070077 on your device.
Before you repair any DLL file, you need to first locate if your computer has this file. Follow the steps below to locate this DLL file on your PC –
- Make a right-click on the Windows icon and select Run.
- Type “spool” and hit OK to open the Spool folder.
- Open the Drivers folder next and locate the folder named “x64”.
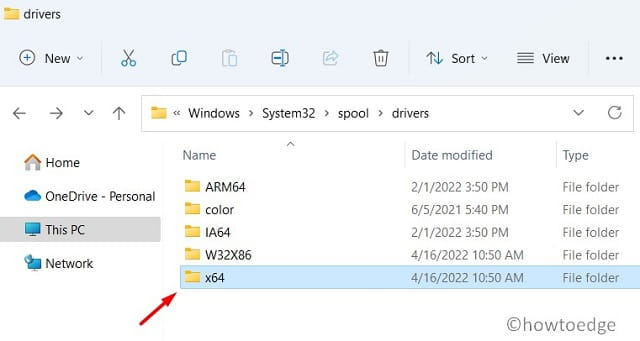
- Inside this folder, check if you can see a DLL file.
If there isn’t a DLL file on your computer, the problem must be occurring because of this. Start a fully functional PC, and re-follow the steps discussed above. Since you are on a well-functioning computer, you will definitely find what you are looking for. Copy this file and paste it on your Pendrive.
Attach your Pendrive to the problematic PC, and copy/paste the missing or damaged DLL file here. I hope the printing job resumes as it was before.
How to share a Printer over Network?
Several users pointed out that they were able to fix this error code 0x80070077 by simply making it shareable. Give this a try and share your printer over a network. To do so, follow these steps –
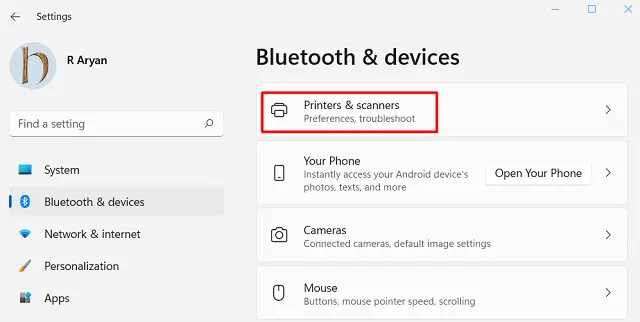
- Press Win + I to launch Windows Settings.
- Select Bluetooth & Devices and then Printers & Scanners.
- Pick the faulty Printer and when it expands, click Printer properties.
- Go to the Sharing tab, and check the option – “Share this printer“.
- Provide a name to this printer, and hit Apply then OK.
Tip: If your printer is already in shared mode, you need to first stop sharing it. Restart your computer and follow the above steps once again.
- Check if the Printer Configuration problem 0x80070077 resolves after this.
How to install pending Printer driver updates?
With the latest changes in Windows 11, users can’t use Device Manager to find and install available updates. Instead, what one might do is visit Windows Update, and hit Check for updates. If this query displays – “Optional updates“, click on it. Moving forward, tick all the boxes, and click “Download and install“. Now, wait while the updates are installed on your computer.
In case the above search doesn’t reveal any optional updates for Printers, get the relevant updates by visiting the OEM website. After you download the recent patch update for your printer, double-click on the Set-Up file to begin its installation.
I hope this article helps to resolve the Printer Configuration problem 0x80070077 on your computer. Let’s know in the comment section if you face any difficulty following any solution in this post.