Recently, Microsoft brings a new attribute called “Recommended Troubleshooting” for its users. The company rolls this feature so as to automatically resolve common issues that occur from time to time. In earlier versions of Windows, users have to manually trace the problems along with their addresses to incorporate the right troubleshooter. With the onset of this Recommended troubleshooting, the OS will detect the trouble and start the diagnosis as well.
Run the troubleshooter automatically will help you to fix the problem permanently. The experts have programmed this app to restore the normal settings of several important services that are compatible with PC’s hardware. Hence, this ensures the well functioning of your System and other operations. Furthermore, users can even disable this option if this is of no use to them. Besides these characteristics, You can also view the history of bugs that are solved using the Recommended troubleshooter on Windows 10.
Recommended Troubleshooting settings on Windows 10
Here is the step-wise guide on how to use, change, disable or view Recommended Troubleshooting settings on Windows 10 –
- Change Recommended Troubleshooting
- Run Recommended Troubleshooting Manually
- Disable Recommended Troubleshooting
- View Recommended Troubleshooting history
1. Change Recommended Troubleshooting
Changing the Recommended Troubleshooting setting is good enough to fix several problems, just perform the below task-
- Press Win & I together to launch the Settings app.
- Here, select Privacy followed by Diagnostic & feedback from the left pane.
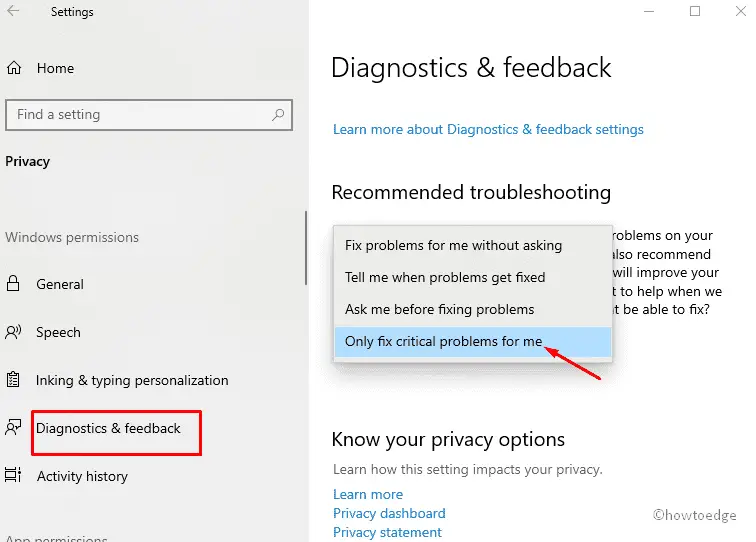
- Switch to the Diagnostic & feedback section on the right pane thereafter choose one option using the drop-down menu. See Snapshot below-

-
- Fix problems for me without asking: If selected, this will automatically solve the bug without even notifying you.
- Tell me when problems get fixed: If you select this option, it will fix the problem by default, however, ask you if any changes are required.
- Ask me before fixing problems (default): This feature will show the notification if the trouble arises. However, this requires your permission to fix the problem at any point in time.
- Only fix critical problems for me: This will address almost all the issues, however, display the notification if there occurs some serious issue.
- At last, when the task is over, your system will automatically fix the trouble and notify you the same depending upon your choice.
2. Run Recommended Troubleshooting Manually
In general, whenever there occurs a problem, Windows Troubleshoot will start automatically. If it doesn’t, you can start recommended troubleshooting following these easy steps-
- Right-click on the Windows icon and select Settings from the Power Menu.
- Henceforth, select Update & Security category among applications.
- When the new window opens up, choose to Troubleshoot available on the left-hand side.
- Afterward, switch to the corresponding right section and click on the Recommended troubleshooting Settings option.

- Furthermore, select Ask me before fixing problems from the four consecutive options.
- If the issue still lies, this will ask your permission to fix the problem.
- Succeeding after, move to the critics’ section such as Internet Connections, Printer, or Windows Update and hit Run the Troubleshooter.
- Once the above task is over, Restart your system.
3. Disable Recommended Troubleshooting
In case you want to disable its characteristics on your PC, follow the steps described below-
- At first, click the start button then tap over the Gear icon.
- Succeeding this, choose Privacy from the list of applications to proceed further.
- Hit Diagnostic & feedback on the next window and switch over to the right pane.
- Here, choose Only fix critical problems for me using the drop-down menu under the Recommended Troubleshooting category.
After you finish the above steps, do note that your System won’t solve any problem in case any arises. Hence, you have to perform any troubleshooting tasks manually.
4. View Recommended Troubleshooting history
Windows 10 logs every issue that has ever occurred in your PC, thus creating a database. You can keep track of all such troubles by performing the below task –
- Go to Cortana and type Settings, once found click on the same to launch the Settings app.
- Select the Update & Security category followed by Troubleshoot from the left pane on the succeeding window.
- Thereupon, move to the right pane of the same window and hit View history. See Snapshot –
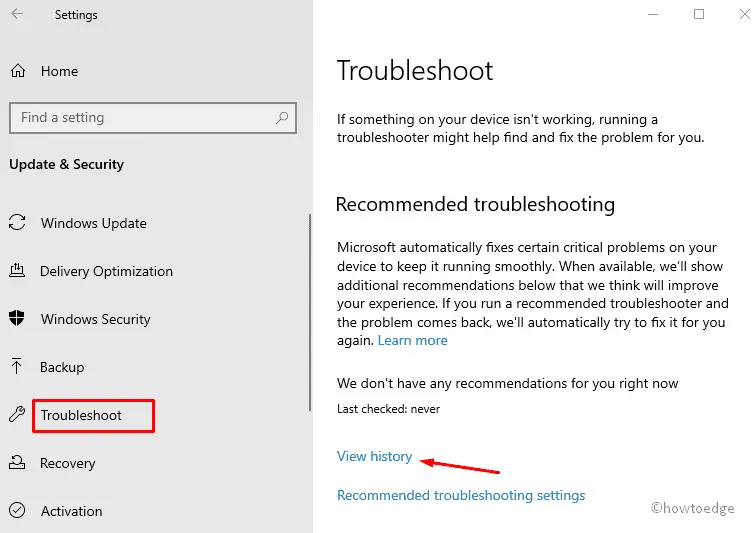
The complete list of fixed attempts that were carried out by the recommended troubleshooter will appear on the Desktop Screen.
Note: Incorporating bugs in Internet Connections, Printer and Windows Update won’t be available in the history.