Microsoft has brought a new cumulative update for its Windows 11, version 22h2 users titled “KB5019509“. Though this is an out-of-band update, this will download and install automatically, provided you have not restricted auto-updates on your PC. As soon as this update installs, you will find tabs in File Explorer. This resembles similar to that of multiple tabs while surfing online on different web browsers.
For most of the users, it’s indeed a great feature by Microsoft. However, there are some users who are exploring ways to disable this new feature on their PCs. Since you are here, you must also be looking for ways to disable it on your device. Worry not, as there is a trick applying which you may enjoy File Explorer the same as before.
Disable tabs in File Explorer on Windows 11
Depending upon which way you initially used to enable File Explorer tabs on your Windows 11, version 22h2, the solution varies as well. Here, we have outlined two ways to disable tabs in File Explorer on the latest version of Windows 11. They are as follows –
1] Directly from File Explorer Settings
If you have enabled tabs in File Explorer using the out-of-band update KB5019509, you need to follow these steps –
- Press Win + E to launch Windows Explorer.
- Click the three horizontal dots in the menu bar and when it expands, select Options. See the Snapshot below.

- Mark the radio button – “Open each folder in its own window”, and hit Apply > OK.

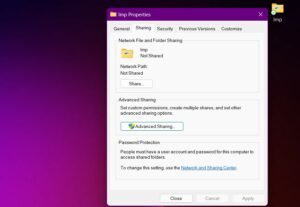
- That’s it, from now onward whenever you double-click on any folder, the same will open in its own window.
If you ever change your mind, you may go to File Explorer > Options, and undo the recent changes. To do so, you must select the “Open each folder in the same window” radio button and hit Apply > OK.
Note: Though applying the above fix will force a new folder to open in a new window, you may still use the new tabbed structure. In case you would like to go back to the original Windows Explorer before this update installing, try the next solution.
2] Using the GitHub ViVeTool
If you want to get rid of the File Explorer tabs on your Windows 11 PC, you may try this third-party tool by GitHub. Here are the steps to follow –
- First of all, visit the GitHub website, and download the latest release of ViVeTool.
- The downloaded file is basically a zipped folder and you need to unzip it next.
- Right-click on the ViVeTool file and select Extract all.

- By default, this tool will extract its files in the same folder. If you want to change it to someplace different, click Browse and select a folder. Click Extract to begin extracting its files.
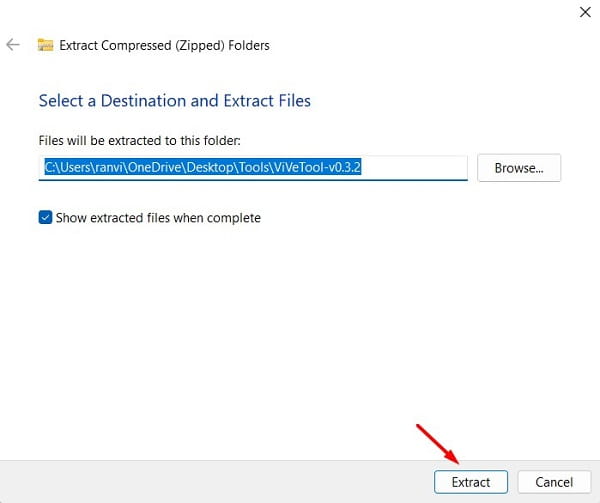
- The system will redirect you to the extracted folder next.
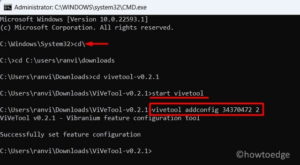
- Copy the URL of this folder and open CMD as administrator.

- You may open Command Prompt using Windows Terminal as well. To do so, press Win + X, and select Windows Terminal (Admin). This will default open into Windows PowerShell (Admin). To switch to the Command Prompt screen, press the “Ctrl + Shift + 2” keys altogether.
- On the elevated console, copy/paste the below command and press Enter.
cd copied URL
- The Command Prompt syntax will change to the ViVeTool-v0.3.2.
- Now, run these codes one after another. Make sure to press the Enter key separately.
vivetool /disable /id:37634385
vivetool /disable /id:36354489

- Restart your PC next and File Explorer tabs will disappear from the subsequent login.
How can I get back tabs in File Explorer?
In case you repent disabling the tabs in File Explorer using ViVeTool, you may turn it back On. However, for this to happen, you must not delete the extracted folder. If you had already deleted that folder, re-download the setup file from here and extract all its contents.
Now, repeat all the steps as guided above except where you use this tool to disable Windows 11 File Explorer tabs. As you are trying to get back the tabs, you need to run these codes instead –
vivetool /enable /id:37634385
vivetool /enable /id:36354489
Restart your PC and when it does reboot, use Win + E to launch File Explorer. You will get back the disabled tabs inside Windows Explorer.
I hope you find this post useful to return back to the old Windows Explorer settings on your computer. Let’s know in the comment section if you face any difficulty following this article.