The printer is a network device that sometimes displays its status as either “Offline” or “Online“. Whenever we require to print any documents, we simply put in the pages and press the “print” button after performing a right-click. Though this works effectively, there may be sometimes when its status displays offline resulting in no output. Here, in this post, we discuss the reasons and workarounds to change the printer status offline to online in Windows 10.
The Printer status reads offline and is unable to share data mainly due to connectivity issues. Sometimes, this might be due to damaged drivers, wrongly configured services or someone has intentionally turned it off. Run the Troubleshooter, Reset Printer settings and Network connection are some useful tools to resolve its current displaying status issue. Let’s explore these solutions in detail –
RECOMMENDED – How to know printer has been hacked and safeguard it on Windows 10
Change printer status offline to online in Windows 10
To change the printer status from Offline to Online in windows 10, use the following workarounds –
1} Check whether the printer is connected to the network
Once you set the printer under the online mode, it doesn’t imply its status remains fixed permanently. In most cases, when your PC enters an idle state, it starts displaying either offline or disconnected. To resolve this trouble, you should turn off the device for a few seconds then check if it meets the necessary requirements.
The Power source of the printer might be one of the prime causes due to which it shows either offline or disconnected. Hence, to get rid of this problem, make sure that the connected power source to the printer is turned ON.
Lastly, confirm if you are receiving the proper network connectivity on your Printer via WiFi, Ethernet, etc.
2} Change Printer Status
Sometimes, the printer status is by-default set to offline, hence it appears as disconnected even after proper network connectivity. To fix this bug, you should change the printer status using the following steps –
Note: Before proceeding to the steps, you must delete all of the print queues. In case, any job is pending, print the data first under offline mode thereafter reset the key.
- Right-click on Start and select Settings using the Power menu.
- Select the Devices category thereafter Printers and Scanners on the succeeding screen.
- Move to the adjacent right pane and click the printer that is showing offline.
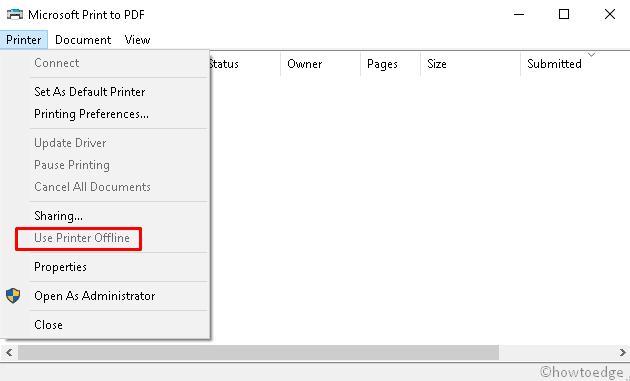
- Now hit the Open queue button.

- Under the Printer tab, disable the Use Printer Offline option.
- Once over, Reboot your PC and check if the printer status displays Online.
In case, the problem is still available, move to the next set of solutions.
3} Run Printer Troubleshooter
If the printer status is still showing as offline, the problem may reside either inside the driver, connectivity, or the services under this package. To resolve this issue, the common workaround is to Run the Troubleshooter. Follow the below steps to perform this task –
- Press Win and I shortcut to launch Settings.
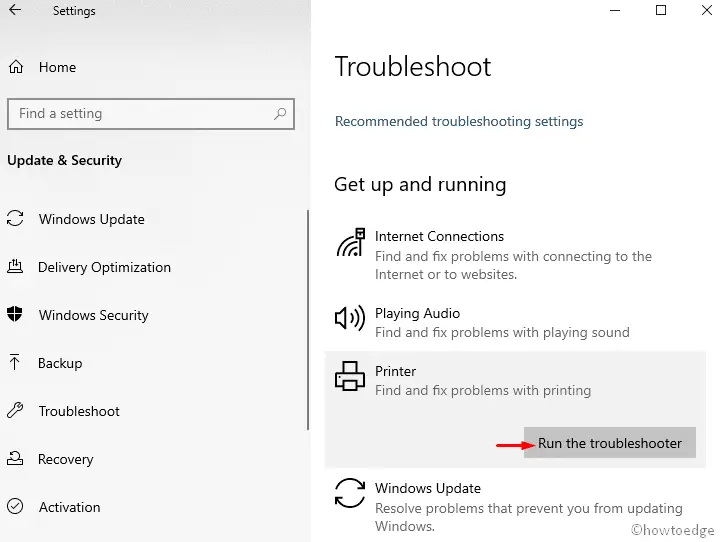
- Select Update and Security thereafter Troubleshoot on the succeeding screen.
- Jump to the right-hand side and tap the Printer.
- Here, hit Run the Troubleshooter.
- This will auto-detect the faults and repair them if possible.
- Once this process finishes, check if the printer status displays Online or not.
4} Reinstall the Printer
Sometimes, the best option is to uninstall the printer and reinstall the device again. This will fresh install the driver along with its OEM activation key. Here is how to do –
- Unplug the printer’s cable from the computer.
- Now go to the Settings app and select the Devices category.
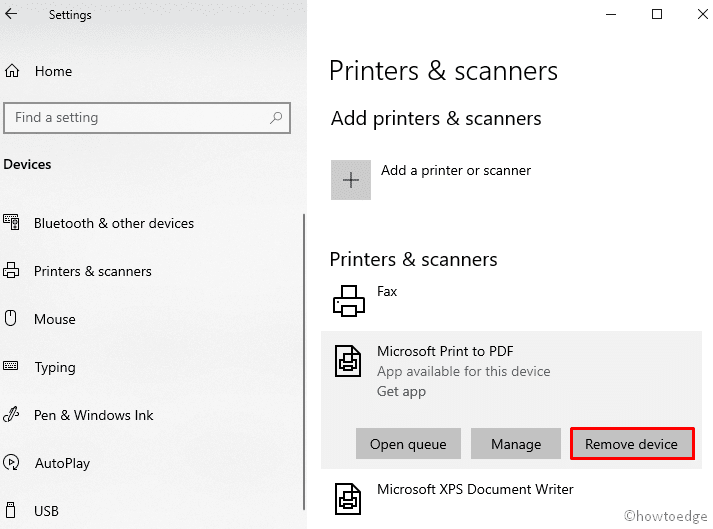
- On the left pane, choose Printers and Scanners.
- Here, select the printer that you intend to uninstall switching to the right pane, and hit Remove device.
- Afterward, plug the printer’s cable back again and follow the onscreen instructions to install the device properly.
- The re-installation printer may restore the printer status to Online.
Add the Printer manually
In case, even after reinstalling the printer software doesn’t correct the printer issue, you should add the same manually. To do this, just perform the following changes –
- At first, navigate to –
Settings > Devices > Printer & Scanner > Add a printer or scanner
- Here, click on “The printer that I want isn’t listed”.

Now, manually install the relevant program files of the Printer that you want to be the default one.
5} Network Printer troubleshooting
After trying the above workarounds, if the printer status is still displaying “Offline” and the device is connected to another computer, there might be some network issue. This situation arises if the Windows Defender firewall detects the device at hand as malware or someone has intentionally blocked the printer. To solve this bug, simply disable the Windows Defender firewall –
- Open the Control Panel.
- Among the available categories, select the Windows Defender Firewall.
- Next, click the link “Turn Windows Defender Firewall on or off” as depicted below –

- Succeeding that check the Turn off Windows Defender Firewall radio button under both the private as well as public networks.
- Click OK to save the changes.

- After completing this task, check whether the printer status showing Online or not.
That’s it.