Registry Editor is the core around which all operations (basic or complex) in Windows 11/10 revolve. This contains all your system’s settings in a hierarchical format, along with most of the apps you’ve installed. If this registry becomes corrupted for any reason, this will make the operating system inoperable. It is important to backup registry in Windows 11 or 10 so that you can restore it when the need arises.
The best way to prevent the registry from being corrupted is to make minimal changes inside it. Even in cases, where modifying the registry is a necessity, make sure to remember the changes that you perform. Since there are other factors as well that may corrupt your registry, it is better is create a backup of the entire registry. Keeping this in mind, we have brought two different ways that you may use to backup and restore the registry on Windows 11 or 10 PC.

Backup Registry in Windows 11 – Two Methods
If you are going to make certain changes inside the registry, you must create a backup of the entire registry editor. To do so, you may follow either of the below methods.
Since the first one doesn’t require making any changes to the registry, we recommend this only. However, if you do have expertise in handling the registry, you may follow the second method as well –
1] Backup registry using System Restore
Follow these steps to build a registry backup on Windows 11 via System restore settings –
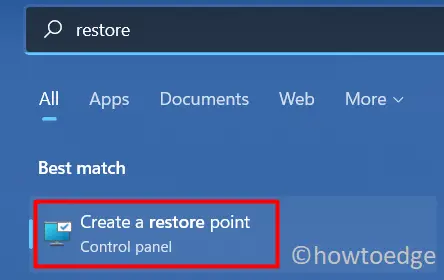
- Press Win + S to launch Start Menu.
- Type “create a restore point”, and hit upon the top result.
- Select the root drive (C:\) under the Protection Settings.

- Click the Configure button next and enable the radio button – “Turn On system protection”.
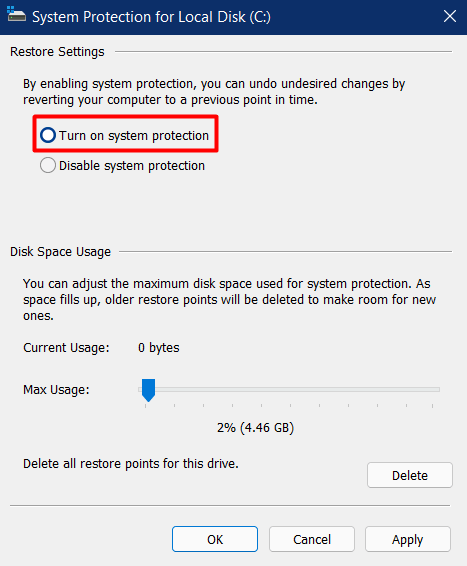
- Press the Create button next and provide a name to this backup.
- Click Create button again and wait while the system is generating a backup.
- When the System Restore Point is created, click Close.
The system will generate a restore point containing all installed apps, system files, system settings, and a registry backup. You may use this backup to revert your PC back to this state anytime in the future.
How to use Restore Point to get back the previous registry setting
On Windows 11, System Restore provides a number of options for restoring the Registry. If you still have access to the desktop, you may use the System Restore tool to revert the database to its prior condition. You can use the recovery tool in Safe Mode or Advanced Startup settings if you can’t access the login screen.
To restore the registry using a system backup, do the following –
- Click on Start, type “Create a restore point“, and hit upon the top result.
- Inside the System properties window, click System Restore.
- Select “Choose a different restore point” and hit Next.
- Tick the box – “Show more restore points” to view all the system backups available on your computer.
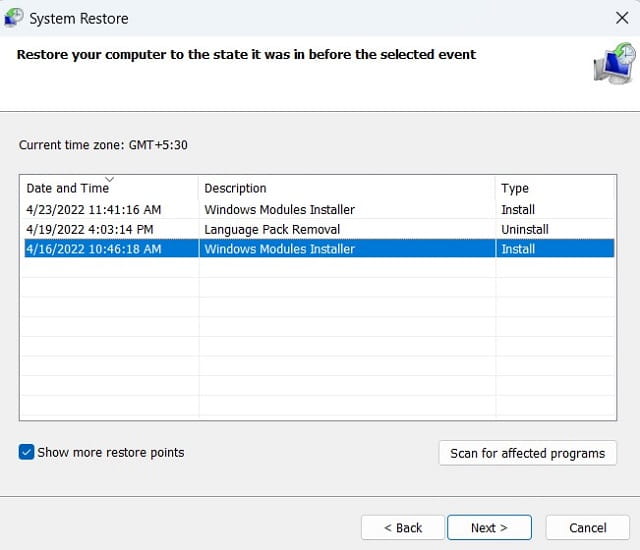
- Pick any one restore point, and click Next again.
- The system will check for any affected programs and start reverting your PC to the chosen state.
Once the restore process completes, your device will restart. That’s it, you are now back to the original registry setting on your computer.
2] Backup registry using Registry Editor
The registry itself provides a way by which you can back up the entire registry for possible corruption in the near future. You need to do the following to attain this task –
- Press Win + R to launch the Run dialog.
- Type regedit inside it and hit OK.
- When the registry editor opens up, go to File, and hit Export.

- Provide a name to this backup and hit Save.
That’s it, a registry backup is now created on your computer. When you visit the folder where you had created the registry backup, you may see a “.reg” file there.
How to use Registry Editor to restore its prior settings
Now that you have generated a registry backup, you may use it to restore the registry’s previous settings. Here’s how to do this –
- Launch Registry Editor first.
- Go to
File > Import. - Now, browse to the location where you had saved the backup file.
- Choose the registry backup file and hit Open.
- Restart your PC to save the restore the registry settings.
This backup will then replace the current database on your Windows 11/10 PC.
Where is registry backup stored?
By default, when you generate a registry backup, this is saved at the below location inside the Scheduled Task Library –
Microsoft\Windows\Registry folder
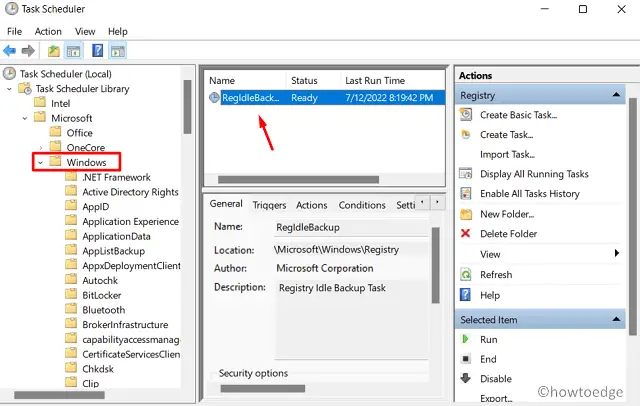
All you require is to open Task Scheduler and navigate to the above path. Here, you may find a RegIdleBackup task which updates automatically when you back up the registry next.
How to create registry backup automatically in Windows 11/10?
When you set registry backup to generate automatically, you need not worry about creating it every time you made any changes to the registry. Furthermore, this lets you choose between available registry backups (older to newer ones). To create registry backups automatically on your Windows 10 PC, you may follow this article.
I hope you found this article useful in backing up your registry in Windows 11. Let’s know in the comment section if you face any difficulty following this post.


