The popularity of the Minecraft game is growing day by day among Windows 10 users. There appears a recent permission issue that reads “An update to your launcher is available Error on Minecraft”. Here, in this blog post, we discuss the probable reasons behind this bug along with providing some quick workarounds.
The outdated version of Minecraft doesn’t support some latest features and hence leads to the fatal error. It is thereby recommended to upgrade this game app to its recent version and delete the previously stored cache inside the .minecraft folder. In certain scenarios, the default troubleshooter might also resolve the Minecraft Launcher Update error. If the self launcher doesn’t appear on the game, try the same manually.

An update to your launcher is available on Minecraft Solution
Here are the proper working approaches to fix updates to your launcher issue on Minecraft-
1] Check the Minecraft Launcher Version
Usually, an old installed version of this game is the prime reason that may cause “An update to your launcher is available to issue” on Minecraft. This is because the former version of Java-based launcher doesn’t support some of the latest attributes. Hence, to fully utilize this tool, you must be having Minecraft version 2.0 or the latest one. Follow these steps to get anew Minecraft game version for your PC-
Step-1: At first, download the latest release of Minecraft. If you don’t know, just go to the minecraft.net.
Step-2: On the next window, fulfill the required credentials thereupon hit the “Create Account” button.

Step-3: Follow the on-screen instructions to complete downloading this app.
Step-4: After the game is updated successfully, open the launcher again and check if the above error has solved or not.
Note: Before downloading the game, do create a backup of data on Minecraft.
2] Delete Old Minecraft Files
If the issue persists even after updating the Minecraft game app, you should better delete the old files that are stored on HDD. For this, you must delete the previously installed folder (if any exist) using the following steps-
Step-1: Initially, press the Win logo and R shortcut key together to begin the Run dialog.
Step-2: In the void area, type %appdata% thereafter press the OK button.
Step-3: Among different categories, select the AppData folder followed by the .minecraft directory.

Step-4: Once found, select and delete this folder. See the snapshot above-
Step-5: Lastly, install the Minecraft launcher again and see if the available update to your launcher is still there or gets resolved.
Note: Keep in mind, deleting the .minecraft folder should be performed only when there is a need to re-install this game.
3] Manually open the Minecraft Launcher
If you still fail to open the launcher, try starting this manually from the installed directories. Here is the complete guideline-
- Press Win key & E hotkey altogether to invoke the File Explorer.
- Now, navigate to the following path-
C: -> Program Files (x86) -> Minecraft -> Game
- Here, explore the Game directory and reach out to the launcher.jar file.
- Succeeding after double-click the Launcher.jar file; this will open the Minecraft launcher without any interruption.
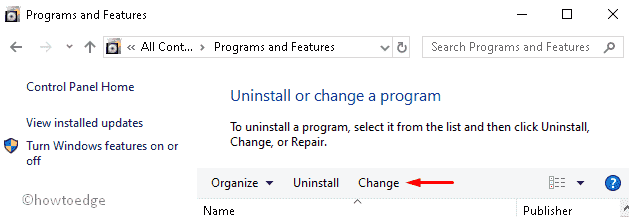
4] Repair Minecraft Launcher
Running troubleshooter might also help to diagnose the underlying cause in this application. Like any other Windows apps, Minecraft also comes with an in-built tool using which one can resolve any issue. Here is the complete procedure-
- Click on the Search icon and type Control Panel in the text box.
- From the list of options, hit the best-matched result to start this desktop app.
- Next, explore the Programs category thereafter Programs and Features.
- Here, reach out to the Minecraft installation and tap Repair/Change available at the top ribbon.
- Henceforth, follow the onscreen instruction until the repairing process is completed.
- After you finish the above task, launch the Minecraft Game again.
That’s it.


